Showing posts with label video conversion. Show all posts

Thursday, February 5, 2015

How to Convert Video to DGP for NDS with Video to DGP Converter?

NDS, short for Nintendo Dual Screen (or Nintendo Developers' System), is a dual-screen handheld game console developed and released by Nintendo with two LCD screens working in tandem. This device is designed for gaming, while also gives users the power to watch videos with vivid color presented. However, it just supports one exclusive video format: DGP. So, if you want to convert your favorite videos to NDS for viewing during the relaxing time after playing games for a while, you need a video to DGP converter to get this task done. And this time, TDMore Video Converter, a powerful video converter, also a professional video to DGP converter shall be taken into your consideration. It will convert your videos to DGP for NDS with the original structure, video and audio quality kept.
Next, let's follow the guide on how to convert video to DGP for NDS with TDMore Video Converter.

Step 1: Finish the installation of TDMore Video Converter
First of all, you need a TDMore Video Converter if you have no one yet. Then you can get it by making a purchase or downloading the latest version, and then finish the installation according to the instructions.

Step 2: Launch TDMore Video Converter, and add the source

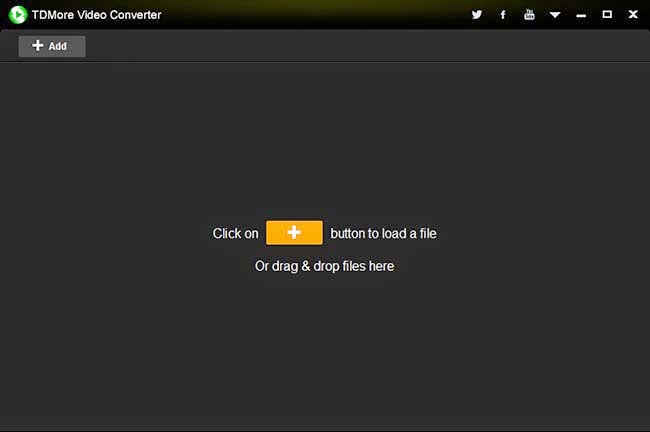
Get the TDMore Video Converter launched after installation. And the click the "+" button at the central part or "+Add" button at the top left corner of the main interface to add the source video in. Also, you can choose to drag & drop it into the main region.

Step 3: Choose NDS, and select the output path
After source loading, you enter into the settings interface. At the upper left, you will see a small display window, which lets you preview the source video before taking the conversion. Move continue, at the upper right, click the profile box to enter into TDMore's profile library. Navigate to Device item and then Others to choose NDS. When you select it and convert the video to NDS, the output video will be DGP format which is suitable for playing on NDS. Plus, you can change the default output quality from Standard to be Fast speed or High quality if you need. And then, go to the "Save to" part, and click the folder icon to select the determination folder for storing.


Step 4: Execute the conversion task
Then, we reach to the last step. Click the Start button, this video to DGP conversion will be started to be executed immediately and finished soon.


Done! Now, you can transfer the output video into your NDS for viewing. Have a nice time!
More information, please visit: http://www.tdmore.com/video-converter.html.

Wednesday, January 14, 2015

How to Convert 4K Videos with 4K Video Converter?

4K, full name of 4K resolution, also called 4K2K, refers to a display device or content having horizontal resolution on the order of 4,000 pixels. Several 4K resolutions exist in the fields of digital television and digital cinematography. 4K has become the common name for ultra-high-definition television (UHDTV), which is adopted widely by Youtube and television industry. With the increasing request of video enthusiasts, 4K has become the developing trend of videos, which produces the supreme video experience with every character, detail presented super clearly. That’s surly a luxury enjoy indescribably.
Have you ever thought watching this super high video feast off cinema on your portable devices? I think many friends must give me the positive answers. Now, let TDMore Video Converter make your dream came true. It is a powerful video converter program, also acts as a professional 4K video converter, which will convert your 4K videos to be much higher quality 2D and even 3D 4K videos with realistic video effect presented for playback on various 4K video devices.

Things you need to prepare: A PC, the correct installation of TDMore Video Converter and the source video you want to convert.

Step 1: Get TDMore Video Converter started up, and import the source

Start TDMore Video Converter up if you have already installed it correctly. Then click the “+” button at the central region or the “+Add” button located at the upper left of the main interface to add the source in. You can also simply drag & drop it into the main region.


Step 2: Choose one 4K video format, and make it more suitable for your need
Soon after the source detection and analysis, you come to the settings interface. Choose the 4K video format you need at the Format library by enter into the profile bank at the upper right. You can choose the normal 2D 4K formats and even the higher 3D 4K format. So powerful this product is! Take a movie preview by the small display window at the upper left if you need. You can also define the output video quality to be fast speed, standard or high quality yourself. Then, navigate to the “Save to” part, and click the folder icon to select the output directory.


Step 3: Get it ran with just one click
Run this 4K video conversion after checking all the settings. This 4K video conversion will immediately be started the second you click the Start button, and finished with the leading 4K conversion processing time. However, the final time will be totally determined by your PC hardware performance and the source size.


That’s the whole process. Now, it’s time for you to enjoy your 4K video feast. Just transfer the output video to your TV, or other devices in support of 4K video playback.
Information you may concern about: